Steps in this guide:
Here’s what we’ll accomplish in this brief guide – we’ll have a custom Gutenberg block that allows you to interface with the WP_Query class. You can loop through your posts or a custom post type and add query parameters like taxonomy, post count, and post order.
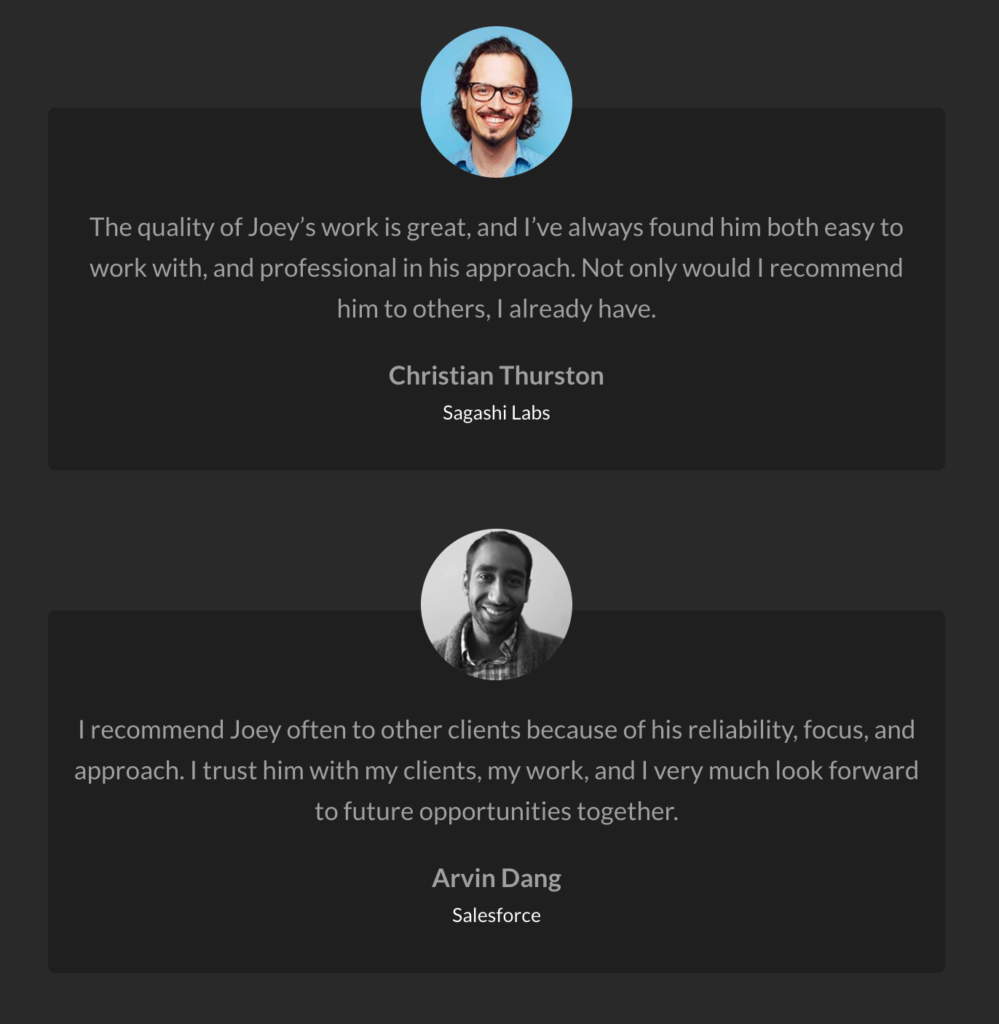
To demonstrate this, we’ll create a Testimonials block. The block will query a testimonial custom post type and display posts in a template.
In my previous post I covered how to create a custom Gutenberg block with Advanced Custom Field’s acf_register_block_type(). But the ACF documentation is a more complete resource.
Setting up the CPT
I recommend using the free CPT UI plugin for quickly setting up custom post types.
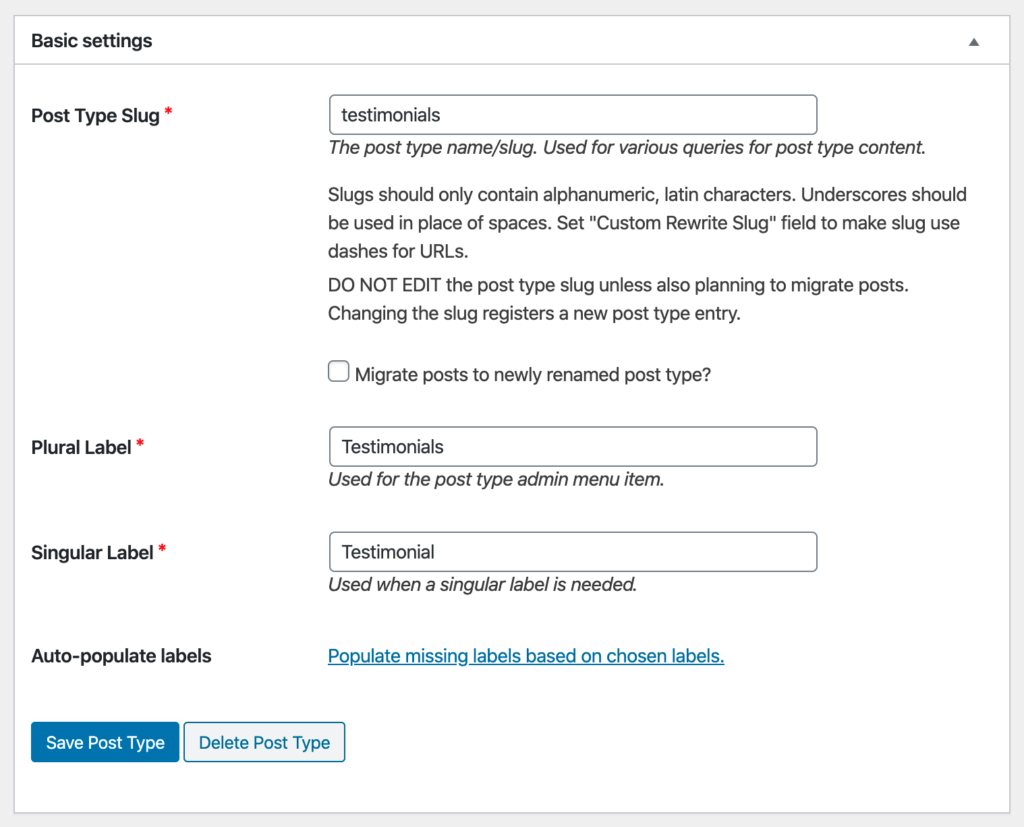
I don’t want to use Gutenberg to create the testimonial itself. The classic editor or custom fields will do just fine. In order to disable Gutenberg for the CPT you need to set the Show in REST API to false. Set it to true if you do want to use the Gutenberg editor.

Creating the Custom Fields
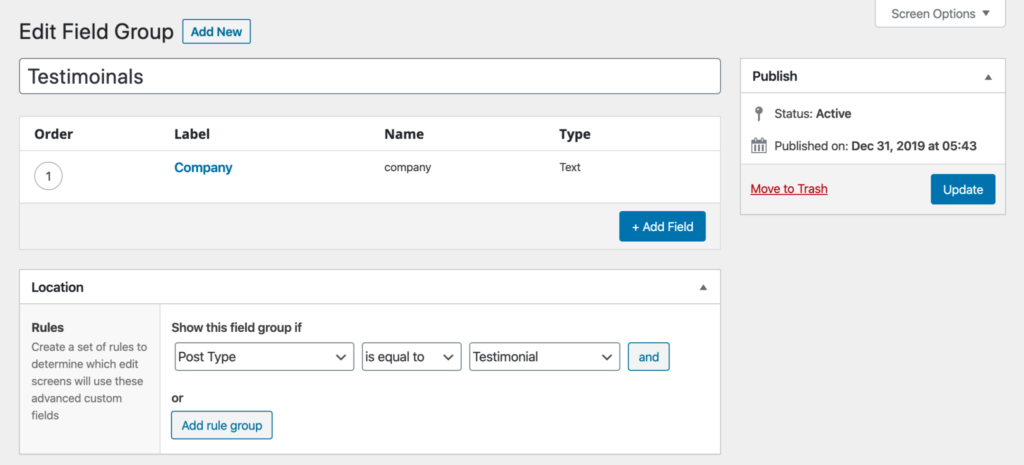
Within Advanced Custom Fields, I created just one field for the testimonial author’s company name. I’ll use the post title for the author’s name, the feature image for the author’s profile image, and the default classic editor for the testimonial content itself.
Register the Block
Within your functions.php file register your testimonial block. Be sure to scan through the ACF documentation to fully understand what’s happening here, but most of it should be self explanatory.
// Register Custom Blocks
add_action('acf/init', 'my_register_blocks');
function my_register_blocks() {

    // check function exists.
    if( function_exists('acf_register_block_type') ) {

        // register a testimonial block.
        acf_register_block_type(array(
            'name'				=> 'testimonials',
            'title'				=> __( 'Testimonials'),
            'description'		=> __( 'A custom testimonial block.'),
            'render_template'   => 'template-parts/blocks/testimonials/block.php',
            'category'			=> 'formatting',
            'icon'				=> 'admin-comments',
            'keywords'			=> array( 'testimonial' ),
            'enqueue_style' => get_template_directory_uri() . '/template-parts/blocks/testimonial/testimonial.css',
        ));
    }
}
A note on enqueuing block CSS and JS:
When you enqueue your CSS and JS within the acf_register_block_type() function, your assets are only loaded when your block is present on a page. And those assets get enqueued both on the front-end and the back-end. If you view your block from the editor with preview mode, you may notice areas where you’ll need to write extra CSS scoped specifically for preview mode in the editor. This is because the Gutenberg editor itself enqueues default styling that may affect your block in an unintended way.
The enqueue_style above reflects the ACF documentation in that the CSS is being enqueued from the same directory as the block template itself.
This isn’t how I do it in my themes though. I have all of my theme and block SCSS in a /src directory and that SCSS gets compiled to CSS and minified in a /dist directory. SCSS files for blocks live in /src/scss/blocks/block_name.scss. That means I’ll enqueue my block CSS like so:
'enqueue_style' => get_template_directory_uri() . '/dist/css/blocks/block_name.min.css'Create the Block Fields
I want some level of configuration over my testimonial block. Depending on where I use it, I’ll want to either loop testimonials with a posts_per_page to set a limit or I’ll want to hand select which testimonials to display.
Back in Advanced Custom Fields we’ll create three fields to create this functionality.
Note: I like prefixing my ACF field groups that contain block controls with “Block:“. This way I can more easily distinguish field groups that are used for the Testimonial CPT and field groups for the block that displays testimonials.
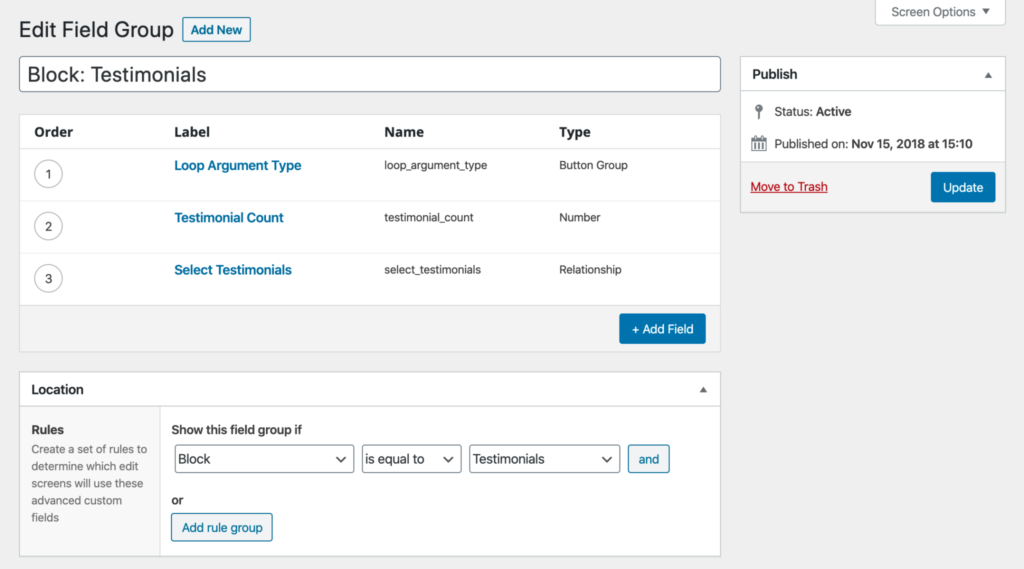
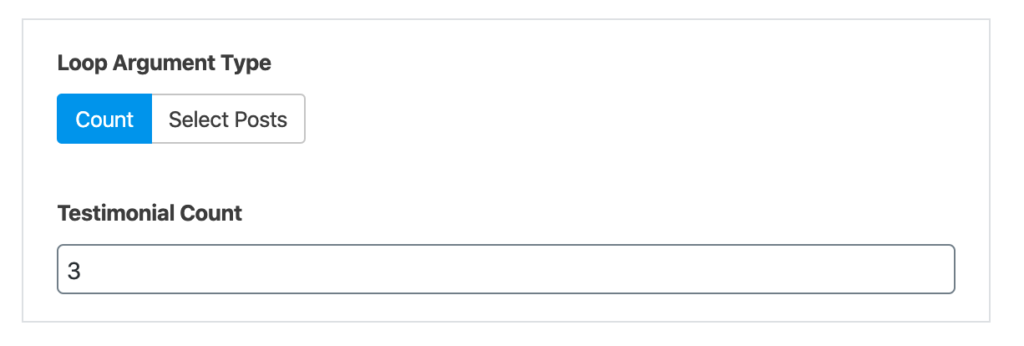
In this field group I’ve created a Button Group to allow the user to select between limiting the post loop with a post count or selecting from a list of published testimonials.
The Loop Argument Type field contains two options:
count : Count
select : Select Posts
Both the Testimonial Count and Select Testimonials fields have a conditional setting to only be displayed based on the selection of Loop Argument Type.
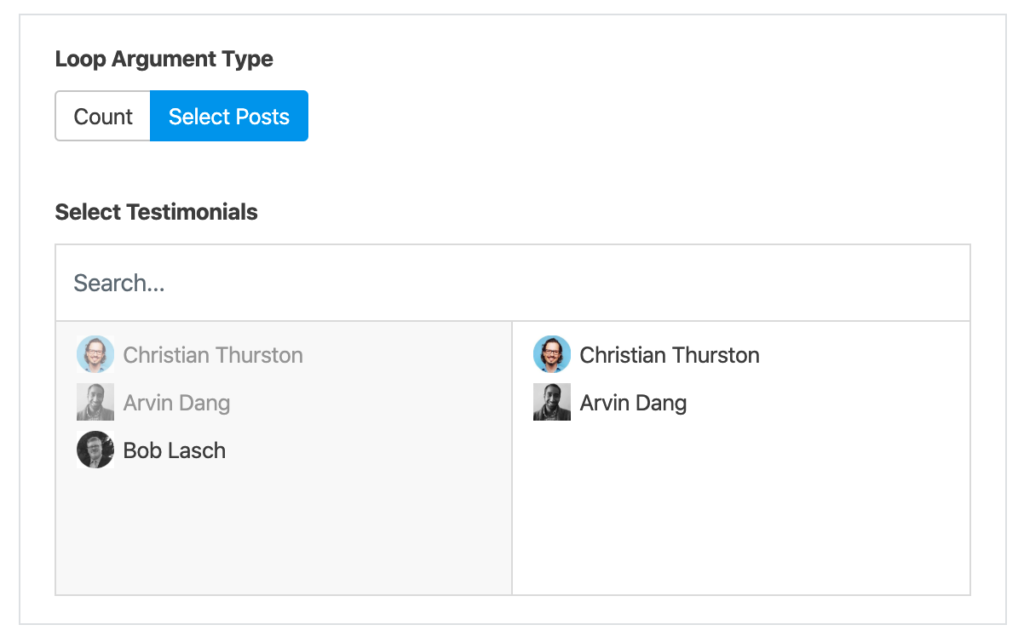
The Select Testimonials field should be set to return just the post ID.
Building the Block Template
Next I’ll create my template and add some PHP to handle any logic needed for the loop.
<?php
/**
 * Block Name: Testimonials
 *
 * This is the template that displays the testimonials loop block.
 */

$argType = get_field( 'loop_argument_type' );
if( $argType == "count" ) :
  $args = array(
    'orderby' => 'title',
    'post_type' => 'testimonials',
    'posts_per_page' => get_field( 'testimonial_count' )
  );
else:
  $testimonials = get_field( 'select_testimonials' );
  $args = array(
    'orderby' => 'title',
    'post_type' => 'testimonials',
    'post__in' => $testimonials
  );
endif;

$the_query = new WP_Query( $args );
Then, I’ll start the loop and populate our testimonial fields in the same template. Now, the markup and CSS is up to you. I’m keeping it simple for this guide.
continued code...

<?php
  if ( $the_query->have_posts() ) :
    while ( $the_query->have_posts() ) : $the_query->the_post(); ?>

      <div class="testimonial">
        <?php the_post_thumbnail('post-thumbnail'); ?>
        <?php the_content(); ?>
        <b><?php the_title(); ?></b> <br>
        <small><?php the_field('company', get_the_ID()); ?></small>
      </div>

    <?php endwhile; ?>
<?php endif;?>
IMPORTANT
There’s one thing that I need to point out here to save you from some frustration. When looping through posts in a Gutenberg block, you must add the post ID as the second parameter when using ‘get_field()’. Otherwise, get_field() is scoped to the post/page that your block is published on and not the testimonial itself.
<?php echo get_field( 'quote', get_the_ID() ); ?>Using the Testimonial Block
I want to add testimonials to my home page, so within the editor I added a testimonial block. If I want to simple display the latest X number of posts, I can do that by setting Loop Argument Type to Count and then setting a Testimonial Count:
But if I wanted to hand pick which testimonials I wanted to display, I could set the Loop Argument Type to Select Posts:
And there we have it! Our custom post type is looped and applied to a custom template which is configurable and reusable as a block throughout any post or page.